Showing posts with label china painted doll kits. Show all posts

Friday, July 20, 2012

Miniature Doll Kits Sold Quickly

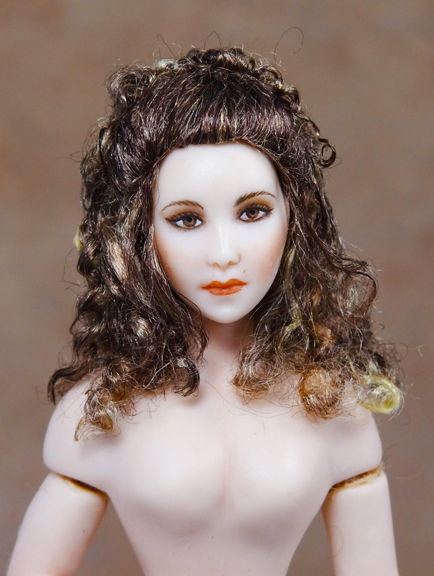
Miniature Doll Laura - Gina BellousThank you to everyone who inquired about purchasing the two lovely ladies. I have been gone for the day. Upon returning my mailbox was flooded with requests to purchase them. I chose the very first person who responded to the post/email.

I will have more kits in the next couple of weeks. If you haven't signed up for my mailing list, please use the "newsletter" box to sign up. Your email will never be given away. You only need to sign up once Pin It

Thursday, June 28, 2012

Free Miniature Doll China Painting Tutorial


Hi All,
It was brought to my attention that my miniature doll, china painting tutorial was missing several pages.   I am not sure how that happened, but I am happy to report it is back up and complete.  You can see the tutorial on my website, here: http://ginabellousdolls.com/china-painting/
I am so sorry for the inconvenence.  I am still adding back the tutorials from my old site as time allows.  I appreciate your following and your patience.

Hugs,
Gina


Pin It

Friday, May 4, 2012

Chantelle Is Finished!

I have finally finished Chantelle.  She gave me a few challenges that I will discuss later.  For now, I just wanted to introduce the finished doll and show you some photos.  I will be posting many more photos of different angles and close ups.  Once I get the photos uploaded to my site, you will be able to see larger, higher resolution images.


Pin It

Saturday, April 28, 2012

Chantelle - Her story unfolds

Today, we will look at several factors when costuming a miniature doll.
  • Draping 
  • Scale
  • Posture of doll
Please click on photos for a slightly larger view.
Here are more photos of Chantelle as the draping of her skirt continues.  As you can see, I use a lot of pins in the process.  These pins happen to be long silk pins, but there are even finer pins out there.  They are insect pins.  I find that these finer silk or insect pins work great to keep the pin holes to a minimum or just very small.

I use pieces of Styrofoam as a base to pin into as I work (I save Styrofoam from products such as TV's. electronics, etc. that have it as protection in their boxes.)

As you can see, I have re pinned and kept the pins in the bottom of Chantelle's skirt.  From now on, until she is finished she will remain pinned to the Styrofoam.  This is to insure that all of the hard work of draping her skirt will not be lost every time I spray or re-spray a part of her costume.

I had to scrap the original gorgeous lace I intended to use for her over skirt as it was just too heavy and out of scale.


Scale is of utmost importance in miniatures.  If you want the costume to be believable then you must use the proper fabrics and trims.
Color really also comes into play when considering scale.  Remember, earlier, I mentioned that the trims are all a dark charcoal color but they certainly read as black, don't they?  True dark black was just too much of a contrast with the amethyst color I chose so the charcoal plays well, fits the scale and adds an aire of elegance and richness rather than looking cheap, which can happen if the scale is not correct.


I had a great piece of antique lace that was just big enough (and long enough) to make the lace overlay skirt I was envisioning for her costume.  It was also perfect because it was sheer and airy and does not hide all of the hard work I put into draping the underskirt.

You want to be sure that the lace overlay also drapes nicely, and does not stick out funny or hide what is underneath it.

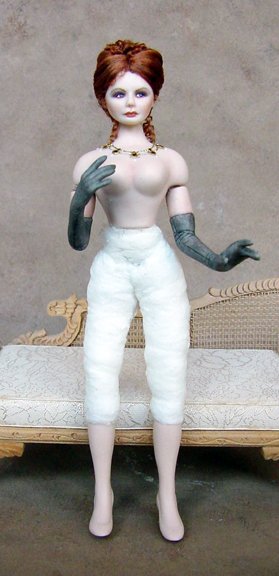
Now let's talk about your doll's posture.  Can you see how regal Chantelle looks?  She is slightly bent forward, causing her back to sway a bit but her chest is held high.  She is not merely standing there.  She already displays an attitude which goes well with that look on her tiny face.  I have always been drawn to that "look" on her face.  I think that is why I kept her back to costume rather than sell her as a kit.  She seems to have so much life in her.

I see a whole story unfolding when I look at her.  This is a woman who perhaps has her eye on a gentleman at a party and is not happy with the attention he is lavishing on a woman she considers her competition.  "Game on!", Chantelle is not going to stand by and watch her would be suitor slip away.   Do you see how having a vision, story, etc. can really help the doll and her costuming come to life?


Next I will be adding all of those fine details and trims that will make this a special gown. 

Please check back!


Pin It

Friday, April 27, 2012

I am Still Working On Chantelle


I am still working on Chantelle in between orders. I am trying to keep her gown simple but elegant. I want it to drape nicely and realistically and I don't want to cover up those pretty gathers I worked so hard to put in. She is coing along nicely.


Pin It

Wednesday, April 18, 2012

Chantelle - Fabric Choices for Gown

I have finally had some time to go through some fashion plates and get some inspiration for the gown that Chantelle will be wearing.  Chantelle has since received the beginnings of her undergarments.

The fashion plate pictured is just for reference.  The gown will be similar but not a miniature copy as I have some other ideas and elements I want to add.  I also have a great pieces of antique lace that I want to incorporate into the skirt as an overlay.  I found this great fashion plate online and was thrilled to see how much it sort of resembles Chantelle, her gloves, etc.


I have decided on a nice color palette of rich lilac & purple and dark charcoal laces.  I went through all of my antique lace & trims and pulled the ones I think will work for the idea I have in my head.  Since all of the lace and trims are ivory colored I had to dye them a deep dark charcoal color.  They will read as black in such a small scale which is what I want.  I used Tulip fabric dye to color the laces.  I added a bit of brown to the black to warm the color up a bit.


I especially love the dark charcoal tuck pleated fabric on the right.  It is originally from the lower edge of an antique pair of pantaloons.  The pleats are only about 1/16" wide.  So fine.  It still has the tiny cotton lace edge attached to the bottom.


I found some terrific silk fabric at a store that was going out of business.  I wish I had bought more.  It dyes beautifully and is so soft.  I used Jacquard Acid Dyes to dye the silk.  It is specially formulated for silk and feathers and really binds to the fabric nicely.  You can see my tutorial on using the Jacquard Acid Dyes (feathers), here:   Silk/Feather Dyeing Tutorial

This dye will NOT work on cotton fabrics which is why I used Tulip Fabric Dye for the cotton lace & trims.

Stay tuned for the next installment of Chantelle!

Pin It

Friday, April 13, 2012

When the follower count gets to 200...

Haley Kit will be blank - not painted
Hi,

Thank you so much for all who are following me.  I hope to be posting more often with doll kits and dressed dolls I am working on. 

When the blog follower count gets to 200, I will hold another contest!  This time it will be for a porcelain doll blank that you can paint yourself. 

You can find my china painting tutorial here:

China Painting Tutorial

It is a great tutorial for beginners and also advanced doll artists looking for some tips on painting eyes, etc.  You will find a list of all the supplies you need as well as the colors and supplies I like to use.  You can also apply these tips to using oil or acrylic paints if you don't have access to a kiln.

Here is a sneek peek at the tutorial:

See the whole tutorial from start to finish here:
China Painting Tutorial


Step #10
Okay, This is one of my favorite parts,
but also one of the MOST frustrating!
I will admit, it sometimes sends
me over the edge, lol.
Wash your brush in water, blot on
paper towel. Dip brush in area
medium, and run brush over your
skin (yep) to blot excess medium
without removing too much from brush.

Carefully set the tip of the brush in the
center of the paint. It will blot up
some of the paint.
Now repeat this step several times
until you can see a nice light circle
in the center. Remove enough paint
to leave a radiant circle in the iris.

Step #11

Ahhh, Dannie, here's looking at you, kid!
Repeat the last step on the opposite eye.
Turn that little head upside down to
make sure the irises match.
This is a really important step.
The irises should be as even as
possible. They should look similar
in size, shape, and coloring.
It is very easy for one to become
lighter or darker than the other
one, and that will show up when
you go to add the pupils. It
will be very noticible.


See the whole tutorial from start to finish here:
China Painting Tutorial

Pin It

Wednesday, April 11, 2012

"Alex" Doll - A Future Bride!

Often times I have a customer who would like me to make a doll in a person's likeness but cannot afford the fees for a one of a kind sculpted doll. 

There are other more affordable ways to have a doll made that will resemble a person.  It helps if you have a good repoire with your dollmaker/artist.  They should be willing to work with you to find the right face and talk about options for hair, painting style, gloves, etc.

My customer wanted me to make a doll kit that she will dress of her daughter for her wedding.  She did not want a custom sculpted doll.  She chose the face from my selection of doll kits I carry on my website: Gina Bellous Dolls .  After narrowing it down, she chose Lydia from a mold by Stacy Hofman.  I had to agree with her that this was a good choice.  It is a mold that is not available commercially, but has no dropped shoulders.  Her daughter is wearing a strapless gown and her shoulders will be bare so no matter what type of shoulders we chose, there will be a seam showing. 

This is Alex. She is such a pretty girl. After making both dolls, I realize that her hair will be worn down like in the photo so doll #1 with the full arms will work just fine, but I like the face of doll #2.


I decided to make 2 dolls and let her choose which one she likes best.  To offer a variation of the shoulders I cut the head off of Stacy's doll and put it on my Victoria body and flattened the bustline a bit.  This gave the doll a nice youthful neckline and  body.  I was able to squeeze her face a bit when I removed it from the mold to make it narrower.


Pin It

Tuesday, April 10, 2012

Sorry I have been away!

Hi,
I have really missed everyone.
So life gets in the way sometimes.  So many things going on and something gets pushed aside!  I have been wigging and assembling so many doll kits that I owe to customers.  I am getting close to being done with them.  I will be posting photos of Chantelle as well as some other ladies as I costume them.
Big Hugs,
Gina
Pin It

Friday, March 9, 2012

Check out the Miniature Online Show!

Hi All,
If you haven't had a chance to do so, please check out the Miniature Show Online:
http://aminiminiatureshow.weebly.com/

A Mini Miniature Show

It will be open from now, March 9th until Monday, March 12th.  There are many miniature artisans at the show and shopping is so easy!  Registration is free and i think there may even be door prizes.  There are 4 pages of vendors (I am on page 4).  So many wonderful miniature items to see and drool over!
Pin It

Tuesday, March 6, 2012

I Have a Few Doll Kits Available In Stock!

Hi All,
I just happen to have a few doll kits in stock.  You can see them on my website:
Miniature Doll Kits In Stock

If you are looking for a doll kit for your next project here is a great way to get a beautiful, finely detailed doll kit without having to wait for it.  In stock and ready to ship.  I only have 1 of each available.  All doll kits come with half arms with separated fingers & half legs with plain heels & assembly instructions.

Charity - Brown Eyes

Victoria 3 - Blue Eyes


Lily - Brown Eyes


Victoria 1 - Blue Eyes


Victoria 2 - Blue Eyes


Victoria 4 - Brown Eyes


Victoria 5 - Blue Eyes


Victoria 6 - Blue Eyes


Pin It

Sunday, February 26, 2012

1/2' Scale Lady in Ballgown

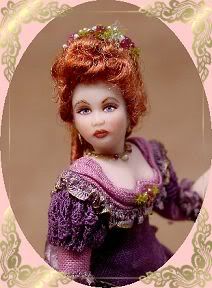
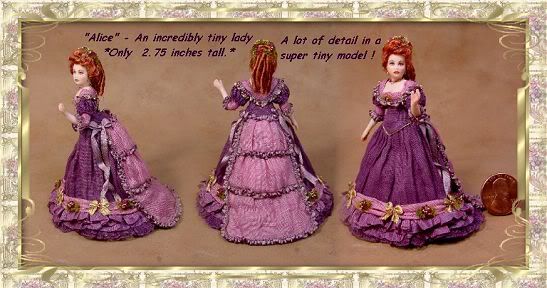
Here is a tiny 1/2' scale lady doll I did quite awhile ago.  Her name is Alice.  I don't do tiny dolls very often but I loved the challenge of getting a lot of scale and detail into such a small doll.  Her face was the size of a pea or small bean.


To see the full size photo of Alice click on images or, click here:
http://i1097.photobucket.com/albums/g345/gbellous/Miniature%20Dolls/Alice_half_sc_4x6_frame_c.jpg


Pin It

Friday, January 20, 2012

Someone New - Chantelle

I had my camera out today, so I couldn't resist giving you a sneek peek of "Chantelle".  She will be a lovely lady in a fancy gown.  I love her dark red hair, but I have always had a thing for redheads!

Chantelle


Pin It

Finishing up some orders and then some FUN stuff!

Hi All,
     It has been awhile since I posted.  I have been working like crazy to finish up my orders!  If your ordered a Victoria, and haven't received her, the rest of the orders will be going out either Monday or Tuesday!  I appreciate every one's patience.  I got a bit behind during the holidays.  If you ordered other dolls, they are also going out by the end of next week or beginning of next.

    Stay tuned, I will have some special ladies to show!
Pin It

Thursday, October 6, 2011

New Monthly Special October 2011

Limited Quantity - Victoria - Painted Doll Kit of the Month
$45.00 - Includes Painted Porcelain, Half Arms & Half Legs with heels


Pin It